My Photography

My Photography
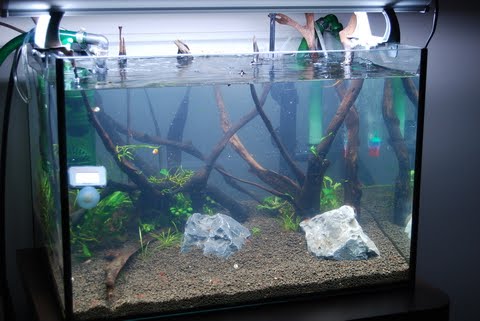
Off topic post, recently a bit active in photo shooting more than aquascape. The reason why I do that is to understand the nature, like Mr Takashi Amano does. So is a helpful skill to develop our aquascaping and some nature behaviour. The place I am staying has such a limited stone scape, but worth for deep in study of the formation. If you like my photography, please drop a 'LIKE' on my link. Thank you very much.
Showing posts with label diy. Show all posts

Tuesday, August 6, 2013

Budget aqua light - partly DIY

I believe many of the hobbyist step into the world of aquatic plant will consider few things, such as setup budget, equipment cost, fertilizer, heath of the plants and etc. As I can share about this budget aqua light, because I have 2 used T5 12000K fluorescent tubes that kept in the storeroom. Normally once a year I'll change the tubes for lighting efficiency to grow some healthy plants.

The top photo is the China made double T5 tube housing ceiling light with electronic ballast just cost around US$18, but it came with the normal fluorescent tubes. What I do is replace the used 12000K tubes and place on top the tank, it works good for aqua light. But the back portion of this ceiling light need to cover with waterproof material, such as PVC, plastic, metal of others, that is to prevent the open case cause electric shock by water.
After tested for a day, some plants show the good sign of photosynthesis happening with add on extra wattage. Perhaps you can try it too, low cost high effective light fitting.

Wednesday, April 14, 2010

DIY a L-pole to suspend the light

It is a pretty fast & simple materials to DIY a light pole/bracket for your aquarium light to a suspend type, first of all need to buy some materials from hardware shop:

1.) L1800mm~2100mm shower curtain rod - RM15.90 (approx US$4.95)
2.) L900mm~1200mm shower curtain rod - RM12.90 (approx. US$4.00)
3.) Curtain wire from IKEA - RM19 (approx. US$5.90)
4.) U shape plastic clip & holder 2 sets - RM2.00 (approx. US$0.65)
5.) Metal wire robe clamp 2 nos. - RM1.80 (approx. US$0.55)
6.) PVC T join for plumbing - RM1.50 (approx. US$0.45)

In total spent of RM52.05(US$16.50) to DIY it. How to make it? From the photos below tell more than words.

join 2 metal rod with this PVC T join. (My cousin complained it does a bit ugly look, but no other parts can replace it at the moment.)


U shape plastic clip & holder to firm the bottom part of metal rod.


U shape plastic clip & holder to firm the middle part of metal rod.


Curtain wire set included this metal wall fitting from IKEA, screwed it on the aluminium light case.


Wire robe clamp to tighten the metal wire.


Here is the final product, it isn't ugly look with all these materials easily found in any hardware shop.

Thursday, April 8, 2010

20" Tank Journal ( Step III )

i) First of all draw out the water with a pipe to lower water level easy for scape.


ii) Started to transplant from the old tank, it took hours for me to select & trim all algae on the leaves.


iii) Spray on some water to wet the leaves.


iv) After put all the balance of plants.....it is still looks too simple.


v) Temporary solution, DIY CO2, had something in mind to upgrade to an external CO2 tank with a solenoid.


vi) After all stuffs ready, bottle+sugar+lukewarm water+......where the heck of my yeast? Searched all areas in the fridge....couldn't find it, I was really fell from the sky. End up have to drive to the nearest store to buy a new pack of instant dry yeast. Wasted an hour, the water became cold, and need to redo for the lukewarm water....later +yeast+soda..........ready to produce CO2.


vii) The previous bottles had threw away, need to make a new one.
poke a hole in the cap & slot in the pipe connector, then seal the small gap with glue gun.


viii) Turn on the other side of the cap and seal with the glue gun for double protection.


ix) When the glue cold down, its really hold tight.


x) Now is the part between cap & plastic bottle.


xi) Try to flatten the glue in between the cap & plastic bottle with the hot gun.
Tips: How to check the leakage? It is simple, put your ear near to the bottle, blow in some air through the pipe, if can't hear the whizzing sound, means no leakage.


xii) Went out for awhile to get some rocks & a background plant, really hate the LFS...no name tag on the plant. Another nightmare on separating the infected hairgrass & the healthy one.
checked water chemistry, all okies. Wait for another day to let water get crystal clear. And more plants to add in later.

Wednesday, March 3, 2010

I will be back in aquatic plants soon!!

Well, in year of 2009 really a busy year for me, I hope in the year 2010 too. Need to keep my spirit in this hobby since I got a placement #230 in ADA IAPLC 2009, but will stop for a year join in that contest.
The old 3' tank has grew with lots of algae, lack of maintenance. Will get a whole new smaller tank to set up with the aquascape, and try to keep everything in low maintenance is the most important. I have found that the Red Cherry in the old tank really looks like chilly red & healthy, may be I didn't dose any chemicals since last year June, cause it won't wash off the colour.
My worry now is how do I move the stuffs over from the old tank at my old house, started my journey to look for a new tank and will try to upgrade with some new system instead of all in DIY. When short of time to maintain, the whole tank really looks like sh*t. I wish my-self a good luck in setting up a new small tank.

Wednesday, July 23, 2008

These are the things in my hood

In the first place, please don't mind the photo shows a bit underexpose, because used high shutter speed to take photo, it will cause the lights look a bit dim, and also the old rusty metal clip & messy hood. This is a custome made aquarium hood that fits in 3nos. 32W NEC 8000K circular light, 2nos. 22W Philips 6500K circular light, and 2nos. 9W red PL-C tube light(bought it wrong, suppose need blue colour instead of red). For the reflector part is using the aluminium foil that normally use in microwave oven.

Some explaination of what is the K, Color temperature is a characteristic of visible light that has important applications in lighting, photography, videography, publishing, and other fields. The color temperature of a light source is determined by comparing its chromaticity with that of an ideal black-body radiator. The temperature (usually measured in kelvin (K)) at which the heated black-body radiator matches the color of the light source is that source's color temperature; for a black body source, it is directly related to Planck's law. Yellow-red colors are considered warm, and blue-green colors are considered cool. Confusingly, higher Kelvin temperatures (3600–5500 K) are considered cool and lower color temperatures (2700–3000 K) are considered warm. Cool light produces higher contrast and is considered better for visual tasks. Warm light is preferred for living spaces because it is considered more flattering to skin tones and clothing. Color temperatures in the 2700–3600 K range is recommended for most general indoor and task lighting.

From the photo above can compare between the 8000K & 6500K colour temperature of the lights, the lower the K value means the more yellow or warm in the flourescent tube. 6500K is the good colour temperature for a healthy plant to grow and almost like the outdoor(places near to Equator, such like South America, Africa and Asia), and when reach to 8000K is almost like in the middle of the mountain, some people using over 10000K of tube lights, the brightness is like standing on top of the mountain looking out from their eyes.

Tuesday, April 29, 2008

Recipe for DIY CO2 & equipments

I have successfully brew the CO2 since many months ago, and sharing my recipe in here.


The sequence & volume uses:
  1. I am using two numbers of 1 litre bottle(1000ml) (as shown in photo below).
  2. Ready 250ml (g) of sugar, fill it in the container.
  3. Pour in 500ml of tap water, and 250ml of boiling water (ratio 2:1).
  4. Do not shake the bottle, let the sugar sink to the bottom with lukewarm water.
  5. And now, put in 2.5ml (1/2 teaspoon) of yeast.
  6. Lastly, put in 5ml (1 teaspoon) of Soda bicarbonate.
  7. Quickly seal the cover to prevent any bacteria get in the bottle.
  8. Put it in a corner for about an hour to let the yeast fully active.

There is evidence that yeast mixtures last longer if you decrease the amount of yeast, and conversely last shorter periods if more yeast is used. Lower yeast also means less CO2 produced per minute, but produce more consistantly over time. Higher yeast levels will cause an initial higher burst of CO2 production with a gradually declining production over time. Keep this in mind while experimenting.

DIY a 1 litre 'milk' bottle is simple, punch a hole and put in a connector and air tube on top the cover and sealed the cover with hot glue gun after mixing yeast, soda and sugar. While this is probably the best method available, it can be cost prohibitive. A nice compromise is the DIY CO2 system. nowadays need to mix in between 9~12 days, and using 2 bottles to push out more bubbles to get 25~35ppm.


DIY a simple plastic container with drilling 2 holes on top the cover and put on the hose connector and air tube, sealed it with the hot glue gun. Then, that is a bubble counter. Later fill in some water to let the bubble out from the tube for counting.


Bought the CO2 reactor on 2006. It works good, diffuse Co2 in water achieve near to perfect. I like it! Even better then the conservative type. And the surface skimmer works good too, no more oil slick on the water surface.