My Photography

My Photography
Off topic post, recently a bit active in photo shooting more than aquascape. The reason why I do that is to understand the nature, like Mr Takashi Amano does. So is a helpful skill to develop our aquascaping and some nature behaviour. The place I am staying has such a limited stone scape, but worth for deep in study of the formation. If you like my photography, please drop a 'LIKE' on my link. Thank you very much.
Showing posts with label planted tank. Show all posts

Thursday, August 23, 2012

After a month - updated photo

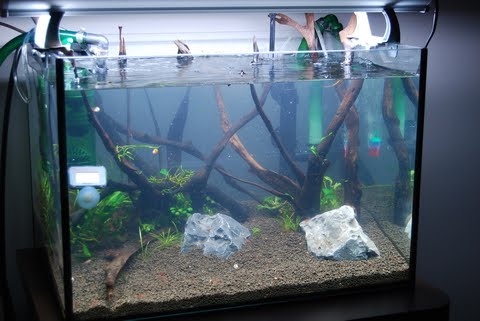
After a month of my hard work on maintain the tank, now it's looking better and with healthy plants, the Red Cherry cleaned up a lot of algae on the stone and leaves. Biweekly change water also helping a lot on reduce the algae from propagates, trimmed a lot infected leaves and minor rescape done in the past month.

Later will consider add in some fishes, but afraid of the young shrimps can't survive long. So far, I am happy with only shrimps & planted tank. Need to keep the shrimps healthy, I think with the algae inside is insufficient for them, will buy some shrimp's food to feed them soon.

Saturday, April 23, 2011

I am back! I am back!!

Since my last post was months ago, the tank also left behind for months. As seen on the photo above, growth with green spot algae, blue green algae and hair algae too. It's a mess tank, really ugly to present, those hair grass also unhealthy and others too. Since I have some ample time to reset certain things, yes! I did it few days ago.

After spent few hours to make over the setting such as cleared the tank glass wall, suck out the fish waste on the ground, took away the drift wood, washed the canister filter, brew new DIY CO2, and etc. And now it's look clean & clear. The shrimps and snails survive in a less chemical tank, of course there are some new generations too. A serious algae infected tank is very hard to cure, but time to time monitoring is a must, and also the control of fertilizer plays the important role in this stage. Is a bit suffer for me to recall what ever the dosage I did before, so lucky that I had created an dosage calculator(chart below) years ago, now is really helpful for me.

Two days later noticed some of the algae has gone, at least now can see the shrimps & snails eating none stopped. I think need a half tank of water change today, to help to get rid of the algae faster. At the moment I am not going to add in any shrimps or fishes, to prevent the over crowded population for them.


Saturday, July 17, 2010

Update my tank photo

It has been nearly 3 months I'd never update my tank, and also lack of time to take care of it. Just trimmed off the plants & clean up the tank, even the scape also a bit messy. But 1 thing I like the the grey stone has grew some green algae on it, really natural look. Planned to add on some stone in someday, and the hairgrass has some hair algae grew on it, I am not really scare about that when the whole system well maintain and it will slowly get away. Nowadays only dose ADA Brighty K, Seachem Flourish Excel & Flourish Trace.

The tiny Pogestemon Helferi "Downoi" is grow up a lot, now is the time to wait for it to grow more babies.

Tuesday, April 13, 2010

Upgraded CO2 diffuser

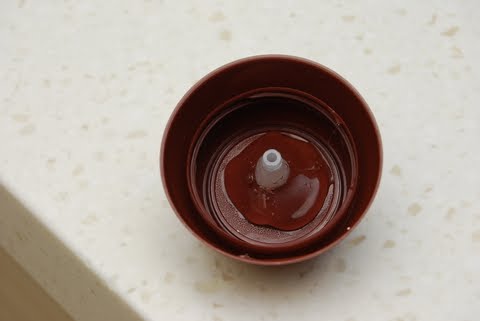
The old CO2 diffuser really looks huge inside the tank, just upgraded to an external type + DIY bubble counter(will upgrade that soon).
So far the rubber seal at the bottom cover of new CO2 diffuser no water leakage and the mixing process is great with some fine bubble produces.


Overall, quite like the new CO2 diffuser, my tank is clean look without the old huge CO2 diffuser. Since the ugly diffuser gone, now the digital thermometer is an issue to me, looks big in front. Another item need to take away soon.


Thursday, April 8, 2010

20" Tank Journal ( Step III )

i) First of all draw out the water with a pipe to lower water level easy for scape.


ii) Started to transplant from the old tank, it took hours for me to select & trim all algae on the leaves.


iii) Spray on some water to wet the leaves.


iv) After put all the balance of plants.....it is still looks too simple.


v) Temporary solution, DIY CO2, had something in mind to upgrade to an external CO2 tank with a solenoid.


vi) After all stuffs ready, bottle+sugar+lukewarm water+......where the heck of my yeast? Searched all areas in the fridge....couldn't find it, I was really fell from the sky. End up have to drive to the nearest store to buy a new pack of instant dry yeast. Wasted an hour, the water became cold, and need to redo for the lukewarm water....later +yeast+soda..........ready to produce CO2.


vii) The previous bottles had threw away, need to make a new one.
poke a hole in the cap & slot in the pipe connector, then seal the small gap with glue gun.


viii) Turn on the other side of the cap and seal with the glue gun for double protection.


ix) When the glue cold down, its really hold tight.


x) Now is the part between cap & plastic bottle.


xi) Try to flatten the glue in between the cap & plastic bottle with the hot gun.
Tips: How to check the leakage? It is simple, put your ear near to the bottle, blow in some air through the pipe, if can't hear the whizzing sound, means no leakage.


xii) Went out for awhile to get some rocks & a background plant, really hate the LFS...no name tag on the plant. Another nightmare on separating the infected hairgrass & the healthy one.
checked water chemistry, all okies. Wait for another day to let water get crystal clear. And more plants to add in later.

Sunday, April 4, 2010

20" Tank Journal ( Step I )


i) Filled JBL Floralpol ground fertilizer with a thin layer.

ii) All area almost covered with the fertilizer.

iii) Started to fill in ADA Aqua Soil - Amazonia II.

iv) Slowly put in the soil and do not disturb the base fertilizer.

v) Double checked anywhere hasn't covered with the soil or too thin layer, because when the time fill up with water will cause some soil floating.

vi) Ready to put some water.

vii) Completed the first step with low level of water & added some beneficial bacteria to grow for few days.

viii) This is the 4" old fan just cleaned it for this setup.

Ready to go!


Finally the cabinet is putting in a corner at my house as a decoration item with the 20" tank bought from KW, I like the black silicon edge instead of the rounded corner tank. And also bought a bag of 9Kg ADA Amazonia II soil is to control the water pH & kH, also got JBL ground fertilizer as I used before in the old tank, not a bad choice too. Will take sometimes to source for lighting & others. Just found an old 4" cooling fan to hook at the edge of the tank, need to get a new power adapter to run a test.

Thinking of order a stainless steel rod to hang the light, and plan to buy more driftwood to play around. I wanna setup the concept looks like Mr Takashi's tank, hopefully I can make it too.

Friday, March 26, 2010

On the way

Just place an ordered to the carpenter for custom made cabinet for my small tank setup, the size will be 550mm(L) x 425mm(D) x 800mm(H), and the tank will be 500mm(L) x 340mm(D) x 340mm(H) a standard 54Li tank. I was thinking to put in a CO2 tank instead of DIY, getting lazy & also because of getting busier. Still under consideration & budget.

Friday, May 29, 2009

A whole new scape!

After months of on & off taking care my tank, now it looks better. In between has problems arisen, such as lack of Ferrum(iron), Calcium and etc.  For Iron deficiency is pretty easy to spot on the young leaves turns to white with green veins, just dose with liquid iron or iron pallet push in the soil. 
And Calcium is a bit hard to tell how much to dose in a week, because plant does not need so much to grow, but for snail use it as building the shell for its protective layer. I did an experiment on stop supplying Calcium for a week or 2, then immediate all the shell of snail turns to white(shell detoriation), the following week onwards keep supplying Calcium, then the shell started build a shining and transparent healthy layer. In this small experiment tells that Calcium is important to keep snail in a healthy condition in the tank. So far each week dosing 1 teaspoon of Calcium Chloride in my 122 litres tank without any problems. Read more about Calcium Chloride at http://en.wikipedia.org/wiki/Calcium_Chloride

Thursday, June 5, 2008

Update: 3' planted tank.

After a busy week of preparation for the contest submission, and here is the updated photo of my planted tank. Aren't added any new plant, but all growing as normal. Just that recenly has some nutrient deficiency sign on the leaves, I believe that cause by cut too many times and without a good root system or my recent added Calcium in it. The Calcium is helping the plant to develop their structural and need more nutrients as well, once the soil base is nutirents deficiency, on the leaves will show some signs. What I need to do is to balance the nutrients in the coming weeks.

Monday, May 5, 2008

Update: 3' planted tank

After few days of rescaping, I trimmed off some unwanted leaves and did water change. As the forum friends suggested to me to remove some white stones, it makes the tank look too unnatural. And added new plants at the rear of the tank's left side.