 Just bought some 'Pelia' & tied on the drift woods, at the moment still looks good, but later when growing up, totally I have no idea how will it be, and because this is the first time I am keeping some 'Pelia' in the tank. I need to do more research on this plant to maintain it in top condition, and do hope that I have more time to do so.

My Photography

Off topic post, recently a bit active in photo shooting more than aquascape. The reason why I do that is to understand the nature, like Mr Takashi Amano does. So is a helpful skill to develop our aquascaping and some nature behaviour. The place I am staying has such a limited stone scape, but worth for deep in study of the formation. If you like my photography, please drop a 'LIKE' on my link. Thank you very much.
Showing posts with label drift wood. Show all posts
Showing posts with label drift wood. Show all posts
Tuesday, July 20, 2010
New plant added!
Just bought some 'Pelia' & tied on the drift woods, at the moment still looks good, but later when growing up, totally I have no idea how will it be, and because this is the first time I am keeping some 'Pelia' in the tank. I need to do more research on this plant to maintain it in top condition, and do hope that I have more time to do so.

Thursday, April 8, 2010
20" Tank Journal ( Step III )


ii) Started to transplant from the old tank, it took hours for me to select & trim all algae on the leaves.

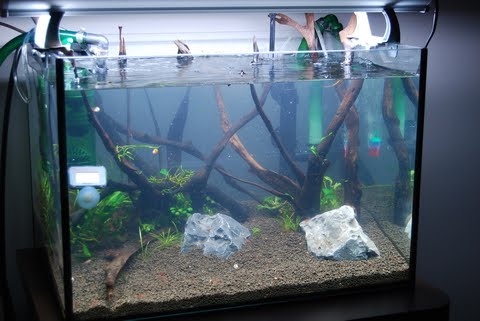
iv) After put all the balance of plants.....it is still looks too simple.

v) Temporary solution, DIY CO2, had something in mind to upgrade to an external CO2 tank with a solenoid.

vi) After all stuffs ready, bottle+sugar+lukewarm water+......where the heck of my yeast? Searched all areas in the fridge....couldn't find it, I was really fell from the sky. End up have to drive to the nearest store to buy a new pack of instant dry yeast. Wasted an hour, the water became cold, and need to redo for the lukewarm water....later +yeast+soda..........ready to produce CO2.
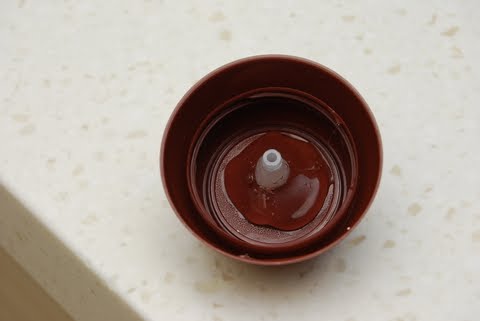
vii) The previous bottles had threw away, need to make a new one.
poke a hole in the cap & slot in the pipe connector, then seal the small gap with glue gun.

viii) Turn on the other side of the cap and seal with the glue gun for double protection.

ix) When the glue cold down, its really hold tight.

x) Now is the part between cap & plastic bottle.

xi) Try to flatten the glue in between the cap & plastic bottle with the hot gun.
Tips: How to check the leakage? It is simple, put your ear near to the bottle, blow in some air through the pipe, if can't hear the whizzing sound, means no leakage.

xii) Went out for awhile to get some rocks & a background plant, really hate the LFS...no name tag on the plant. Another nightmare on separating the infected hairgrass & the healthy one.
checked water chemistry, all okies. Wait for another day to let water get crystal clear. And more plants to add in later.
Tuesday, April 6, 2010
20" Tank Journal ( Step II )
Went to a few LFS to shop for the lights, finally I've got what I wanted, it is a the Aqua Zonic Super Bright double tube 24W T5 lamp with 12000K brightness, and it cost around RM160(50USD).


Put up the light to test for the brightness. It is really a good workmanship, and I am highly recommended this light for a small tank.

This is nightmare, went back to my old house to collect all those full of algae driftwoods, the time I spent on washing it, was really killing my back. Tried to arrange it on the floor before put in the tank.

Still not the final arrangement, need some fine tuning. Meanwhile added some water to 1/3 of the tank.
Thursday, May 1, 2008
Rescape my tank


 Was really tired after rescaping my aquatic tank until midnight, it took me a few hours to relocate the stones, plants and did water change as well. Water is still in cloudy condition as you can see in the photo, perhaps 2 days later, the water will be crystal clear again.
So far the design is satisfying, however there are still room to improve on the layout. Well, this is my third time rescape the tank, and it's really a tough work. Now I will leave the tank to stabilize for 2 weeks to allow the plants to grow bushy and by then I will trim the plants to achieve the planned layout.
Subscribe to:
Posts (Atom)